출처 TIBCO 홈페이지!
참고:
Automation Services API | TIBCO Spotfire Server
Automation Service API는 등록된 작업을 제어하고 모니터링 하는데 사용할 수 있습니다.
1. API 클라이언트 등록
API를 사용하기 전에 클라이언트 자격 증명을 얻기 위해 API 클라이언트를 등록해야합니다.
config 명령어 위치: 제품 설치된 경로/ tomcat / spotfire-bin
(버전에 따라 bin, spotfire-bin이 다릅니다)
C : \ tibco \ tss \ 7.13 \ tomcat \ spotfire-bin> config register-api-client --name=Hming -Sapi.rest.automation-services-job.execute --client-profile=other -Gclient_credentials
C : \ tibco \ tss \ 7.13 \ tomcat \ spotfire-bin>config register-api-client --name=Hming -Sapi.rest.automation-services-job.execute --client-profile=other -Gclient_credentials을 실행해줍니다.
❗ Automation Service 제어를 위해서는 Scope를 api.rest.automation-services-job.execute로 설정 하는 것에 주의
등록이 완료되면 성공했다고 메세지가 뜹니다.
여기에서 client-id, client-secret은 나중에 사용을 대비해 꼭 기록해둬야함!!!

🚩
Client ID: 12773f89f420f4fd2db86bf11cb0eaca.oauth-clients.spotfire.tibco.com
Client secret: 5fe585e795fc62926ede34de7be71dcc0474bb6d4143f40a63c38d34e92a16ff
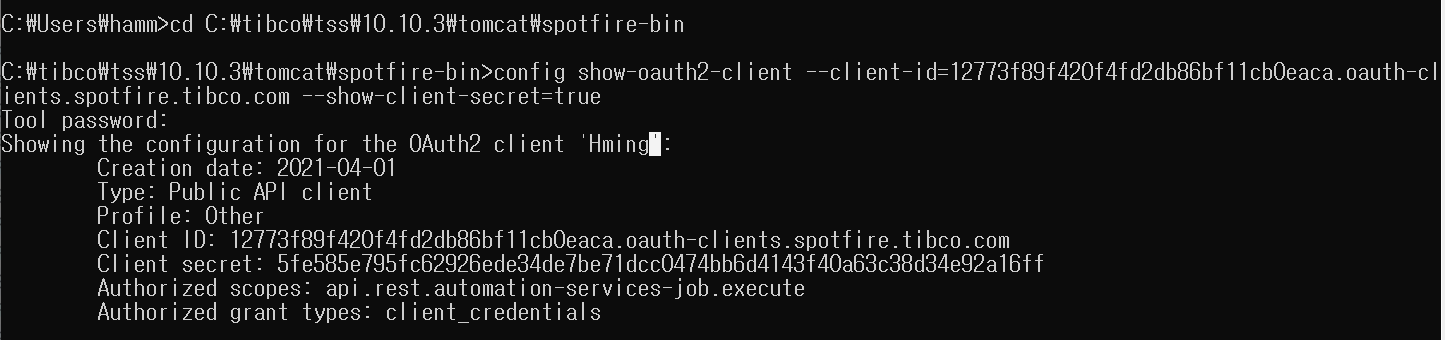
제대로 생성되었나 확인하기!
config show-oauth2-client --client-id=<<클라이언트 ID>> --show-client-secret=true
🔊 클라이언트 ID임... userID만 열다섯번 넣음... ㅋ0ㅋ
config show-oauth2-client --client-id=12773f89f420f4fd2db86bf11cb0eaca.oauth-clients.spotfire.tibco.com --show-client-secret=true
2. postman으로 토큰 받기
POSTMAN 접속해줍니다.
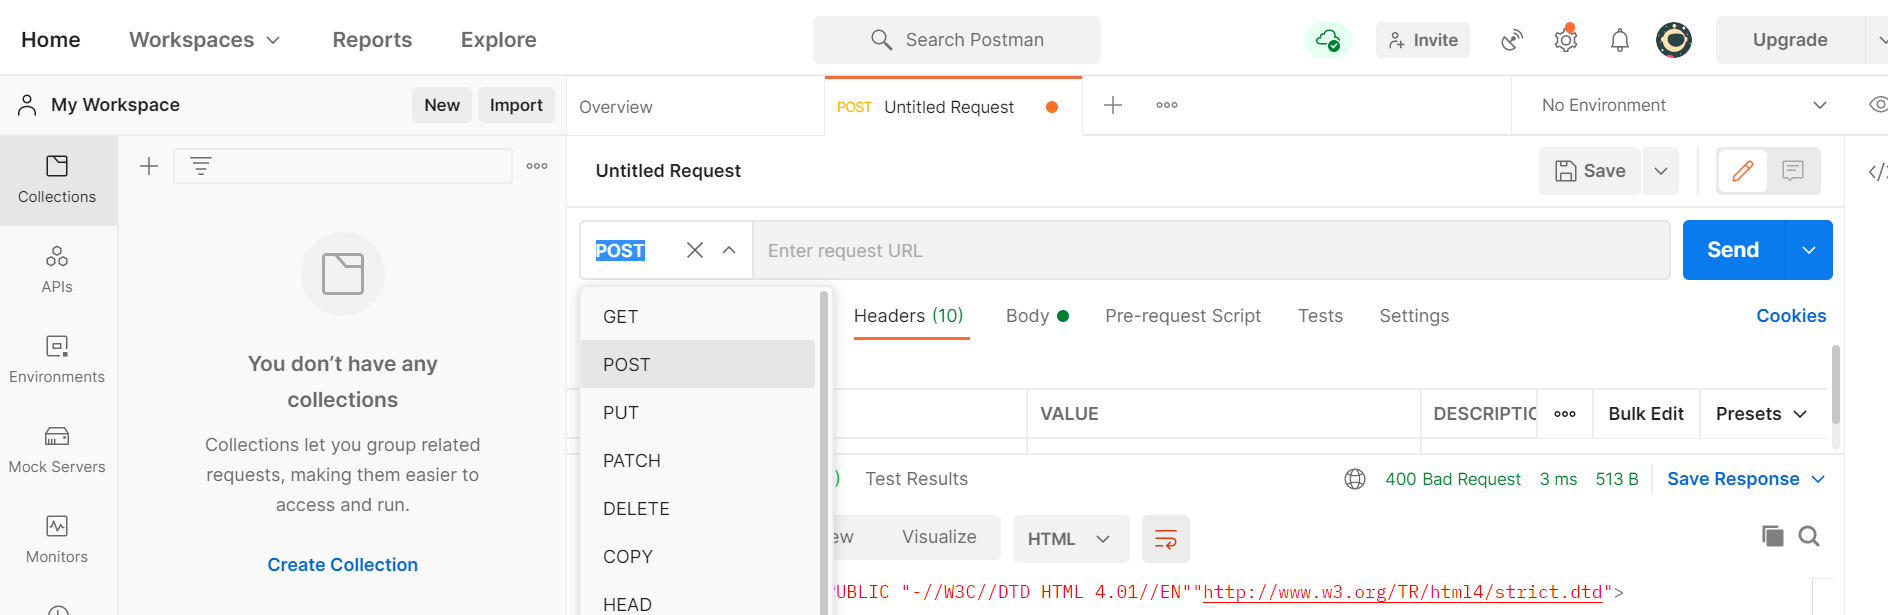
- My Workspace 들어가서 + 버튼으로 하나 만들어줍니다.

-방법을 POST로 바꿔 줍니다.

-Authorization에 clientID와 비밀번호를 넣어줍니다.

| KEY | VALUE |
| grant_type | client_credentials |
| scope | api.rest.automation-services-job.execute |
-Body x-www-form-urlencoded를 선택하고, KEY, VALUE에 값을 넣어줍니다.
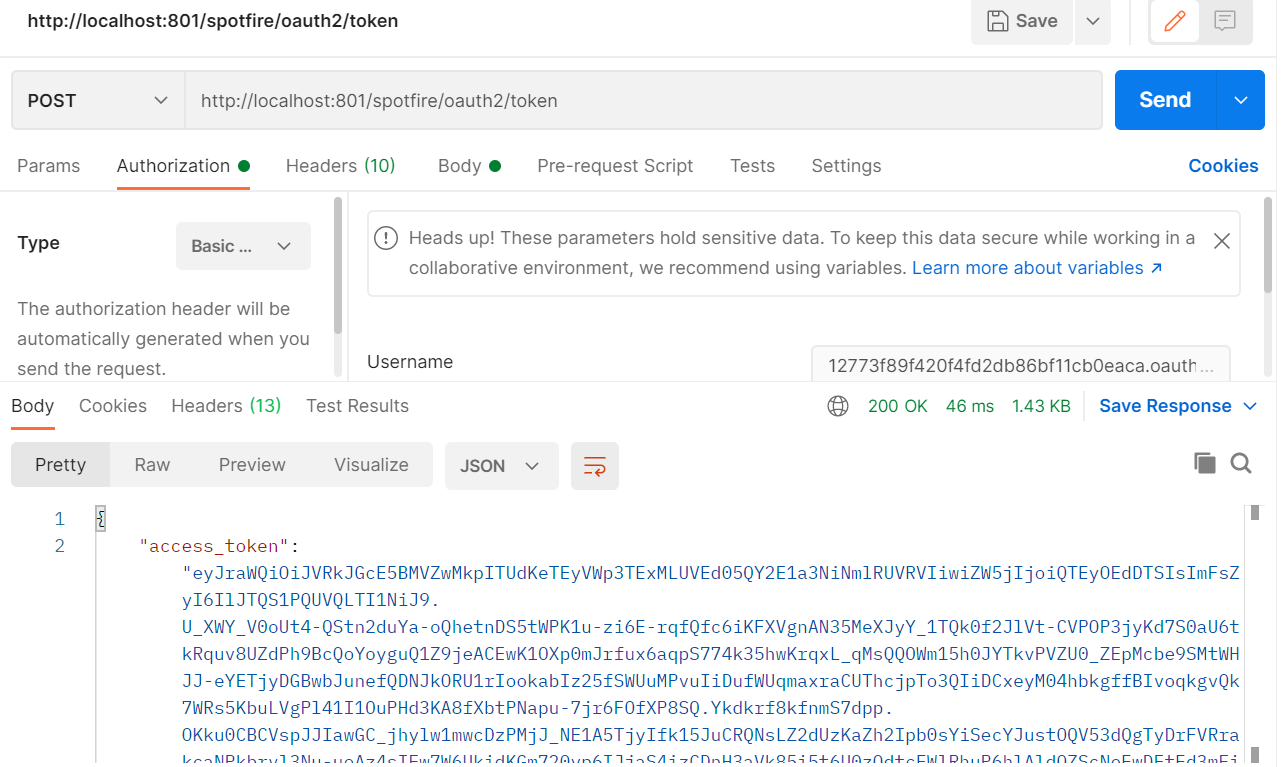
여기서 얻은 token값을 Authorization을 Bear Token으로 설정하고 넣어주면 끝!
send을 보내면 조회한 작업의 상태를 볼 수 있습니다.
'언어|프로그램 메모장 > spotfire' 카테고리의 다른 글
| spotfire TERR 설치된 R 패키지 버전 확인하기 (1) | 2021.06.04 |
|---|---|
| spotfire terr spk 생성하기 + 패키지 업로드하기! -(2) (2) | 2021.05.18 |
| spotfire terr spk 생성하기 + 패키지 업로드하기! (0) | 2021.05.12 |
| Spotfire Automation Services - 이메일 전송!! (6) | 2021.05.07 |
| Spotfire Automation services library 관리자 권한 부여 (0) | 2021.04.06 |


댓글