Automation Services- SMTP 설정 및 이메일 세부 정보 전송 방법❕❕
-> 구글 이메일로 등록하기
with 구글번역...
너없이 못살아 구글 주식 살꺼야...
-> 근데 애플삼. 2주 ㅎㅎ0ㅎㅎㅎ0ㅎㅎ
1) On the Spotfire Server machine, launch a command prompt as Administrator.
Spotfire 서버 컴퓨터에서 관리자 권한으로 명령 프롬프트를 시작합니다.
로컬에 깔려있으므로 그냥 cmd 켜서 작업 ~
2) "export-service-config"명령을 사용하여 Automation Services 구성을 내 보냅니다.
이 명령에 대한 추가 정보는 Spotfire 서버 설치 및 구성 매뉴얼을 검토하십시오. ....
예)
config export-service-config --capability=AUTOMATION_SERVICES --deployment-area=Production
을 실행해줍니다.
먼저 cmd 위치를 config 파일이 있는 폴더로 이동하고 작업해줍니다!

경로:
10.2 이하에서는 내 보낸 구성 파일이 \ tomcat \ bin \ config \ root 폴더에 저장
. 10.3 이상에서는 내 보낸 구성 파일이 \ tomcat \ spotfire-bin \ config \ root 폴더에 저장


3). Open the Spotfire.Dxp.Worker.Automation.config file in a text editor.
Spotfire.Dxp.Worker.Automation.config file은,
tomcat \ spotfire-bin \ config \ root 폴더에 있습니다.
4). Search for Spotfire.Automation.SendMail.SMTPHost parameter and update the desired parameter values, e.g. the SMTP server name and also the "from" email address.
Spotfire.Dxp.Worker.Automation.config 을 편집기로 열고
Spotfire.Automation.SendMail.SMTPHost부분을 찾고 업데이트 해줍니다.

밑과 같은 느낌으로 변경해줍니다.
smtp 주소 /

원래 smtp 기본포트는 25이다.
useTls ="true"로 변경해줌.
5) 파일을 저장해주세요.
🤞🤞
6). "import-service-config"명령을 사용하여 수정 된 구성을 가져옵니다.
7). 변경 사항과 관련된 "config-name"값을 입력하십시오. 이것은 자동화 서비스에 사용되어야하는 구성입니다. 이 명령에 대한 추가 정보는 Spotfire 서버 설치 및 구성 매뉴얼을 검토하십시오.
++ 근데 그때는 저렇게 고생하면서 구문 찾아냈는데, (6)~(7) 번 묶어서
간단.
config import-service-config --config-name="smtp"

서비스 구성 'stmp'를 성공적으로 가져와 동일한 이름으로 기존 구성을 덮어 씁니다.
가져온 구성을 적용하려면 'set-service-config'명령을 실행하십시오.
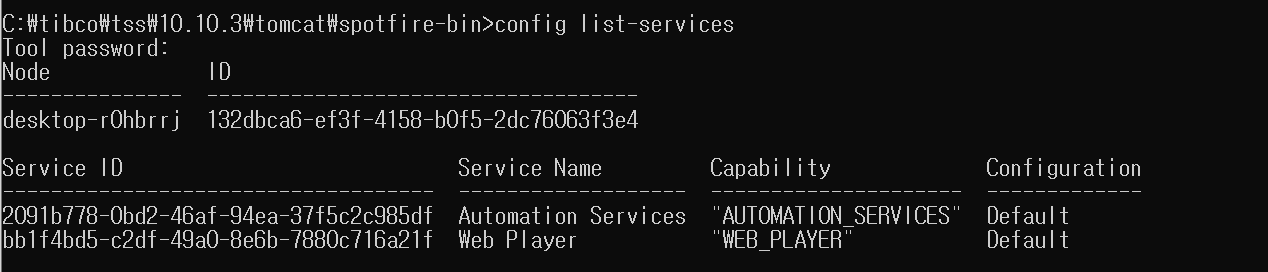
이렇게하려면 'list-services'명령에서 가져온 서비스 ID가 필요합니다.
ㄴ 저 영어 번역본 ㅎ0ㅎ
+) 따라서 cmd에
config list-services 명령 쳐서,
이러한 결과를 얻어내었다.,..!
8) 변경 사항과 관련된 "config-name"값을 입력하십시오
config set-service-config --service-id=2091b778-0bd2-46af-94ea-37f5c2c985df --config-name=smtp

(자세히 보면 서비스 id가 다른데 두번 재 설치해서 구롷다.... 전에것,,,!)
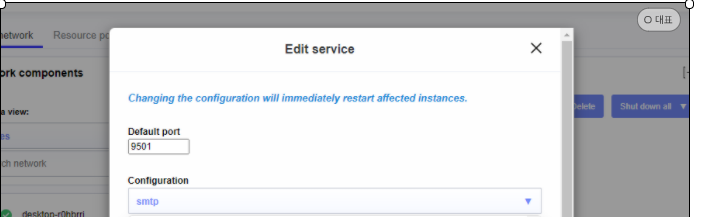
9) spotfire 서버로 들어가서 node manager edit 클릭

edit 클릭해서,
새로 생성한 config name 넣어준다!!!!
지저분한 것들은 연습...했던 기록물.. 뭐넣는지 몰라서...
이렇게 설정한 후에는, analyst에서 이메일 보내기 실행하면 된다!
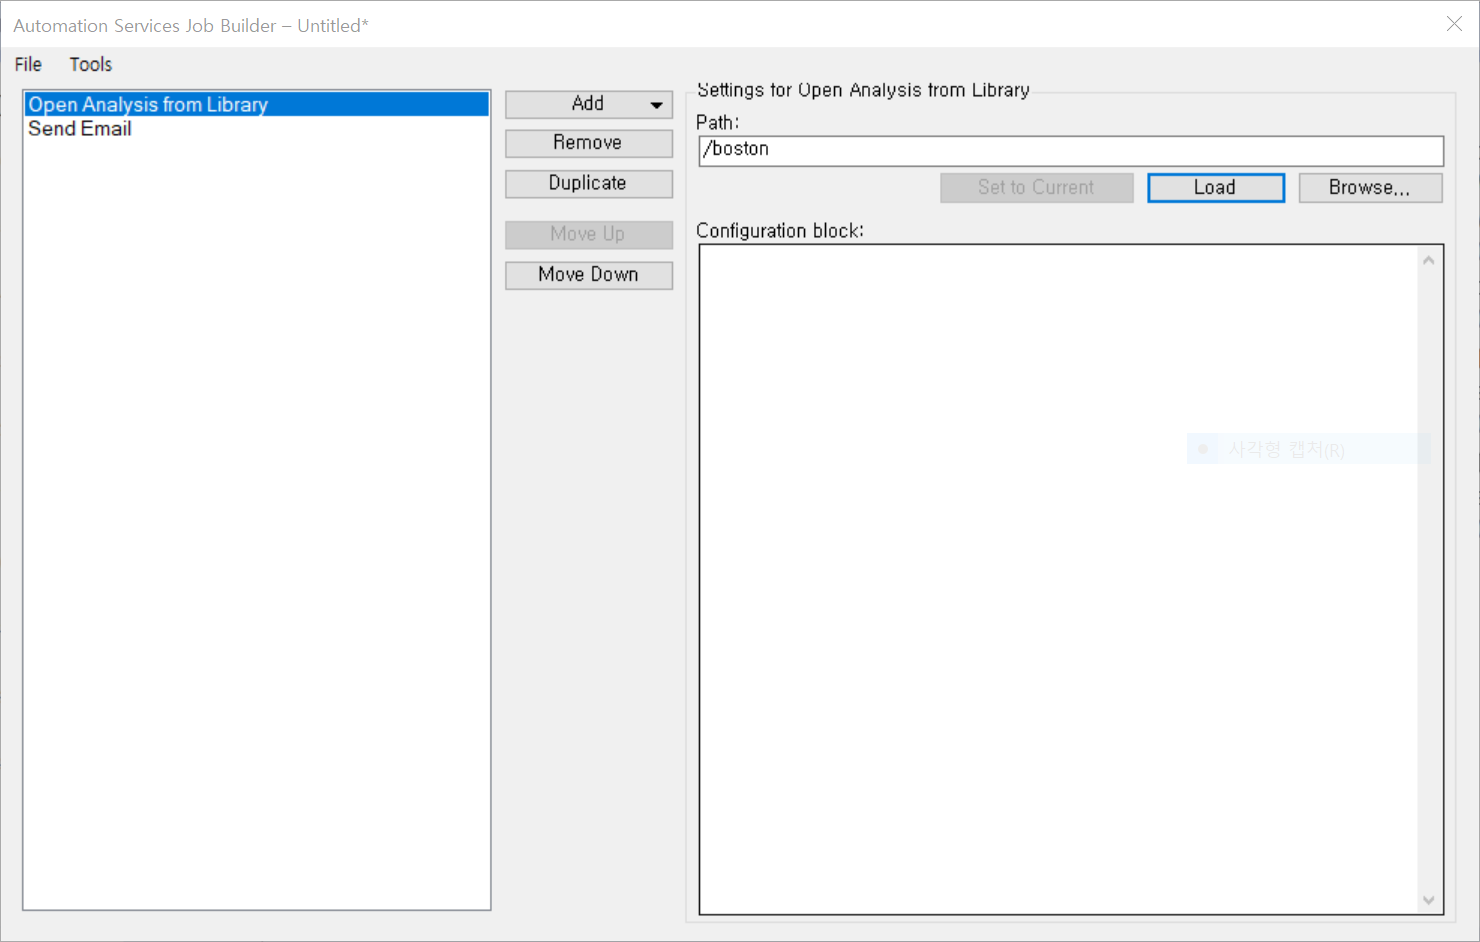
이렇게 Add 선택후 open analysis from library 눌러주어 로드할 분석물을 선택!
꼭 오른쪽의 Load를 클릭해준다!
Add로 Send Email을 누른 후에 로드한 분석물에 관한 메일 작성 후 보내기 하면 완료!
참고:
gmail smtp 설정
Adding SMTP settings to the Spotfire.Dxp.Worker.Automation.config file
TIBCO Spotfire® Automation Services User's Guide
'언어|프로그램 메모장 > spotfire' 카테고리의 다른 글
| Automaion Service API 작업 실행 (0) | 2021.05.14 |
|---|---|
| spotfire terr spk 생성하기 + 패키지 업로드하기! (0) | 2021.05.12 |
| Spotfire Automation services library 관리자 권한 부여 (0) | 2021.04.06 |
| spotfire - postgres data source 연결 (2) | 2021.03.27 |
| CentOS7 TDV uninstall (0) | 2021.03.26 |


댓글